Survive 100 Nights: a beginner’s guide to your first ten nights
Survive 100 Nights: guía para principiantes de tus diez primeras noches
How a run works, what to build on day one, how villagers and the wall work, and ten tips to reach your first boss.
Cómo funciona una partida, qué construir el primer día, cómo funcionan los aldeanos y la muralla, y diez consejos para llegar a tu primer jefe.
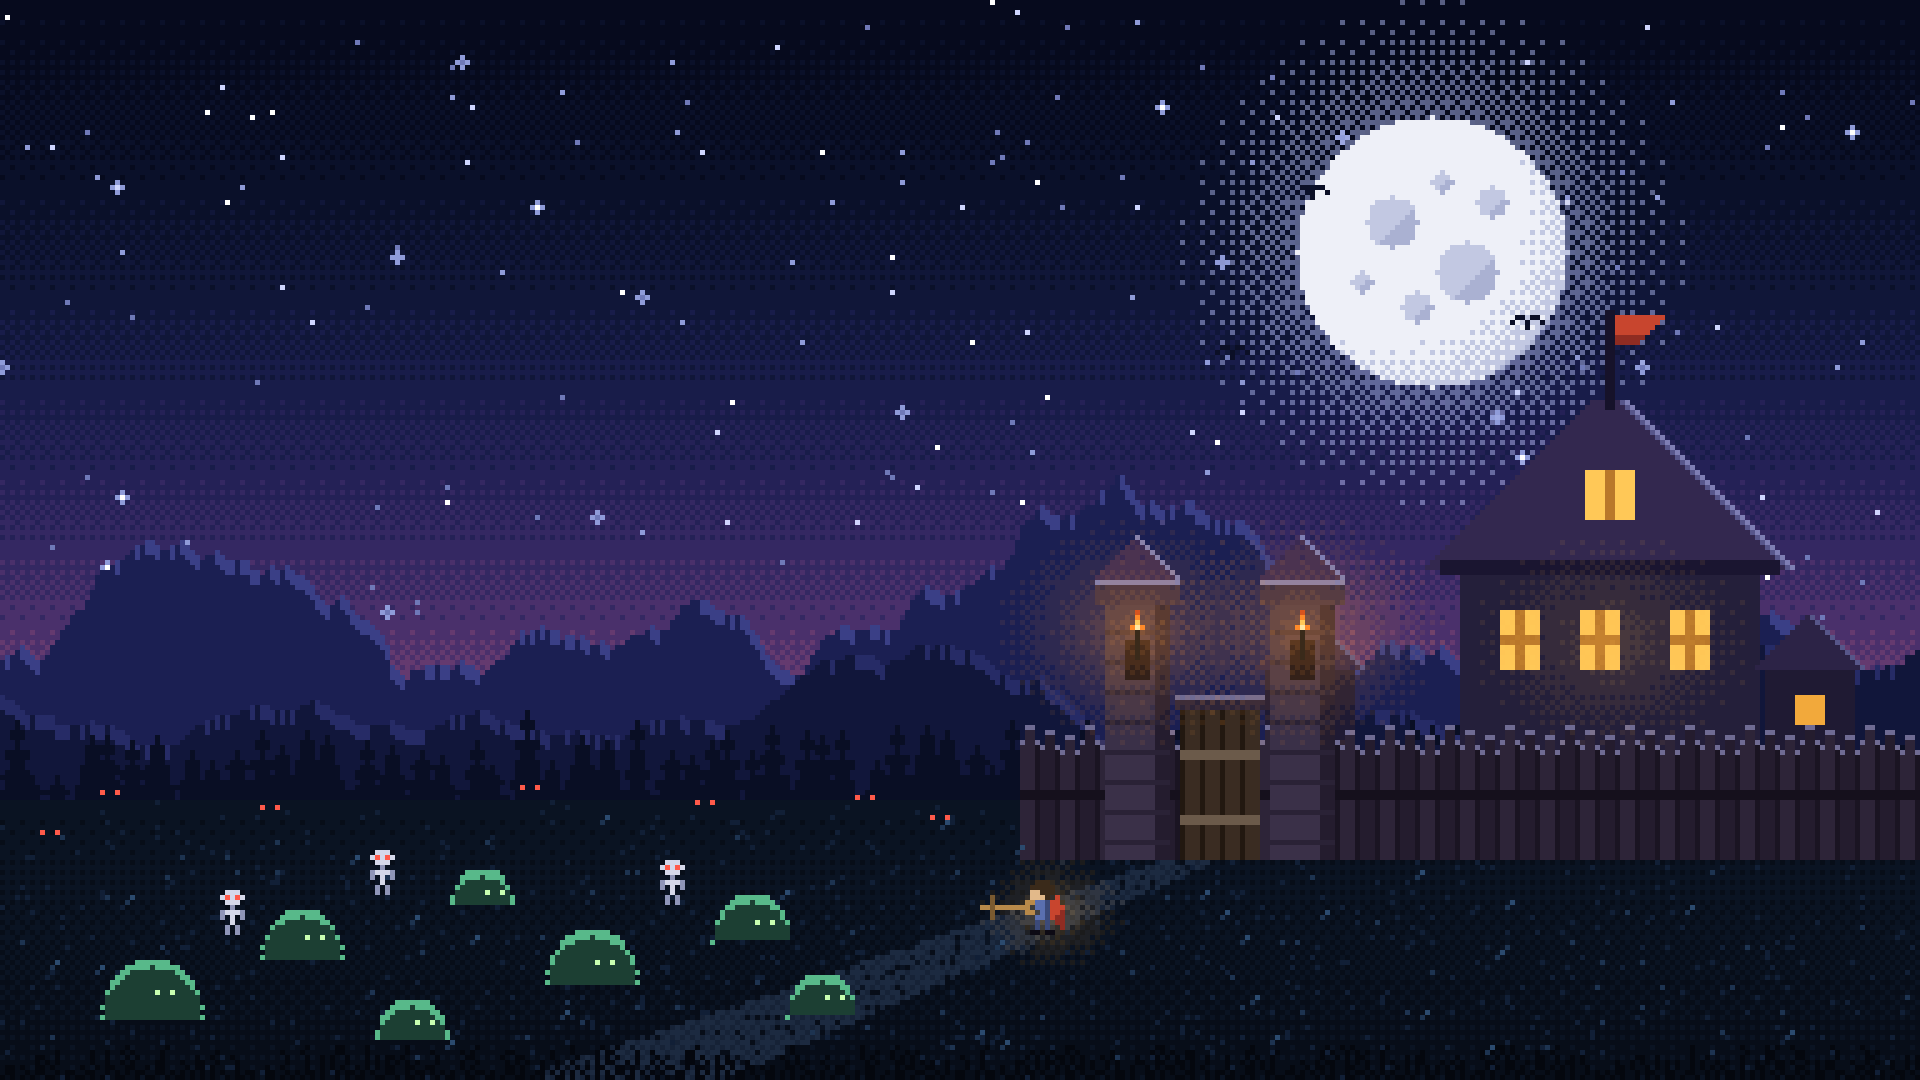
Survive 100 Nights looks simple: build by day, fight by night. But the first few runs usually end before night ten, and almost always for the same reasons. This guide covers what you need to know to get through your first boss.
How a run works
Every run is a loop of three parts:
- Day (30 seconds). No enemies. You build, hire villagers, buy upgrades and get ready.
- Night (60 seconds at first, up to 90 by the end). The screen goes dark and enemies walk in to attack your Town Hall.
- Sunrise. Leftover enemies burn away, coins on the ground are collected for you, and you and the Town Hall get 30% of your health back.
The run ends if your health or the Town Hall’s health reaches zero. When that happens you lose your level, abilities, weapons, buildings and upgrades. You keep your skins, your best night and the Soul Shards you earned.
Controls
| Action | Phone | Computer |
|---|---|---|
| Move | Joystick, lower left | W A S D or arrow keys |
| Shoot | Round button, lower right | Space bar |
| Dash (once learned) | Small button above shoot | Shift |
| Use what you’re standing next to | The button that appears | E |
| Pause | ❚❚ at the top | Esc or P |
Shots fly at the nearest enemy in range, so you can focus on moving. Hold the shoot button to keep firing.
Your first day
You start with 40 wood, 15 stone and 10 gold. A strong first day looks like this:
- Build a Sawmill on one of the six fenced plots along the path. It costs 12 wood and 4 stone.
- Walk into the Town Hall and hire a villager at the desk (10 wood and 6 gold). New villagers go straight to the first building with a free place.
- Chop a tree if you have time left. Three chops fell it for 5 wood.
- Ring the bell inside the Town Hall when you’re ready, instead of waiting for the clock.
A building with nobody working in it makes nothing, so a villager matters more than a second building on day one.
Buildings and villagers
There are three buildings: the Sawmill (wood), the Quarry (stone) and the Gold Mine (gold). Each villager working in one makes a batch every 10 seconds of daylight, and each building can be upgraded to level 5 for more workers and bigger batches.
At night, villagers run home. In the Town Hall menu you can give them night jobs instead:
- Archers stand inside the wall and shoot.
- Healers stand by the door and heal you when you’re close to the hall.
- Menders repair the wall.
Keep your villagers safe: every time the Town Hall loses a fifth of its health in one night, one villager is in danger. The Shelter upgrade lowers the risk.
The wall changes everything
Buy Stone Walls and a wall goes up around the whole village. From then on, enemies that walk can’t climb it: they go around to the single gate and pile up there. That turns every night into one fight at one spot, which is far easier to win.
Not every enemy plays along. Brutes and Exploders smash the wall instead of walking around it, and bats and ghosts fly over it. If the wall’s own health runs out, it falls for the rest of the night; it’s rebuilt at sunrise.
Once you have the wall, buy Wall Towers. The first two stand on either side of the gate and shoot the enemies queuing there.
Gold and daily tasks
Gold mostly comes from enemies. They drop coins where they die, and a coin left on the ground fades after 20 seconds, so collect it while it’s close.
Every morning, three daily tasks appear on the left of the screen: kill a number of enemies, keep the Town Hall above a certain health, and so on. Each one pays out as soon as you complete it, and the rewards grow every night.
Level-ups and rarities
Kills give experience. On each level-up you choose one of three ability cards, from Common to Mythic. The better rarities become more likely as the nights go on:
| Rarity | Night 1 | Night 30 | Night 60 and later |
|---|---|---|---|
| Common | 70% | 48% | 25% |
| Rare | 24% | 27% | 30% |
| Epic | 5% | 15% | 25% |
| Legendary | 1% | 7% | 14% |
| Mythic | 0% | 3% | 6% |
Ten tips for your first runs
- Get a villager working on day one. An empty building is wasted wood.
- Ring the bell early once you’ve spent everything. Waiting gives you nothing.
- Buy Stone Walls as soon as you can afford it.
- Stand near the gate at night: that’s where the enemies end up.
- Pick up coins quickly; they disappear after 20 seconds.
- Read the three daily tasks every morning. They’re free resources.
- Don’t chase enemies far into the dark. Most of them will come to you.
- Save before you quit: the game also saves by itself at dawn and dusk.
- Night 10 brings the first mini-boss, and the night doesn’t end until it’s beaten. Have the wall and at least one tower by then.
- Spend your Soul Shards between runs. They make every next run a little stronger.
Survive 100 Nights parece sencillo: construir de día y luchar de noche. Pero las primeras partidas suelen acabar antes de la noche diez, y casi siempre por los mismos motivos. Esta guía explica lo que necesitas para llegar a tu primer jefe.
Cómo funciona una partida
Cada partida repite tres fases:
- Día (30 segundos). No hay enemigos. Construyes, contratas aldeanos, compras mejoras y te preparas.
- Noche (60 segundos al principio, hasta 90 al final). La pantalla se oscurece y los enemigos atacan tu ayuntamiento.
- Amanecer. Los enemigos que quedan se queman, las monedas del suelo se recogen solas y tú y el ayuntamiento recuperáis el 30% de la vida.
La partida termina si tu vida o la del ayuntamiento llega a cero. Entonces pierdes el nivel, las habilidades, las armas, los edificios y las mejoras. Conservas los aspectos, tu mejor noche y los Fragmentos de Alma que hayas ganado.
Controles
| Acción | Móvil | Ordenador |
|---|---|---|
| Moverse | Joystick, abajo a la izquierda | W A S D o flechas |
| Disparar | Botón redondo, abajo a la derecha | Barra espaciadora |
| Esquiva (cuando la aprendes) | Botón pequeño sobre el de disparo | Mayús |
| Usar lo que tienes al lado | El botón que aparece | E |
| Pausa | ❚❚ arriba | Esc o P |
Los disparos van solos al enemigo más cercano, así que puedes centrarte en moverte. Mantén pulsado el botón para disparar sin parar.
Tu primer día
Empiezas con 40 de madera, 15 de piedra y 10 de oro. Un buen primer día es así:
- Construye un Aserradero en una de las seis parcelas valladas del camino. Cuesta 12 de madera y 4 de piedra.
- Entra en el ayuntamiento y contrata a un aldeano en el escritorio (10 de madera y 6 de oro). Los aldeanos nuevos van solos al primer edificio con un puesto libre.
- Tala un árbol si te sobra tiempo. Con tres golpes cae y da 5 de madera.
- Toca la campana dentro del ayuntamiento cuando estés listo, en lugar de esperar al reloj.
Un edificio sin nadie trabajando no produce nada, así que el primer día importa más un aldeano que un segundo edificio.
Edificios y aldeanos
Hay tres edificios: el Aserradero (madera), la Cantera (piedra) y la Mina de oro (oro). Cada aldeano que trabaja en uno produce un lote cada 10 segundos de luz, y cada edificio se puede mejorar hasta el nivel 5 para tener más trabajadores y lotes más grandes.
De noche, los aldeanos corren a casa. En el menú del ayuntamiento puedes darles trabajos nocturnos:
- Los arqueros se colocan dentro de la muralla y disparan.
- Los sanadores esperan junto a la puerta y te curan cuando estás cerca del ayuntamiento.
- Los reparadores arreglan la muralla.
Protege a tus aldeanos: cada vez que el ayuntamiento pierde una quinta parte de su vida en una noche, un aldeano corre peligro. La mejora Refugio reduce el riesgo.
La muralla lo cambia todo
Compra Murallas de piedra y se levanta una muralla alrededor de toda la aldea. A partir de entonces, los enemigos que caminan no pueden trepar: rodean la aldea hasta la única puerta y se amontonan allí. Así cada noche se convierte en una sola pelea en un solo sitio, mucho más fácil de ganar.
No todos los enemigos siguen las reglas. Los Brutos y los Explosivos rompen la muralla en lugar de rodearla, y los murciélagos y los fantasmas la sobrevuelan. Si la muralla se queda sin vida, cae durante el resto de la noche; al amanecer se reconstruye.
Cuando tengas la muralla, compra Torres de muralla. Las dos primeras están a los lados de la puerta y disparan a los enemigos que hacen cola.
Oro y tareas diarias
El oro sale sobre todo de los enemigos. Sueltan monedas al morir, y una moneda que se queda en el suelo desaparece a los 20 segundos, así que recógela mientras esté cerca.
Cada mañana aparecen tres tareas diarias a la izquierda de la pantalla: matar cierto número de enemigos, mantener el ayuntamiento por encima de cierta vida, etc. Cada una paga en cuanto la completas, y las recompensas crecen cada noche.
Subidas de nivel y rarezas
Las bajas dan experiencia. En cada subida de nivel eliges una de tres cartas de habilidad, de Común a Mítica. Las rarezas mejores son más probables según avanzan las noches:
| Rareza | Noche 1 | Noche 30 | Noche 60 en adelante |
|---|---|---|---|
| Común | 70% | 48% | 25% |
| Rara | 24% | 27% | 30% |
| Épica | 5% | 15% | 25% |
| Legendaria | 1% | 7% | 14% |
| Mítica | 0% | 3% | 6% |
Diez consejos para tus primeras partidas
- Pon a trabajar a un aldeano el primer día. Un edificio vacío es madera perdida.
- Toca la campana pronto cuando ya lo hayas gastado todo. Esperar no te da nada.
- Compra Murallas de piedra en cuanto puedas.
- De noche, quédate cerca de la puerta: ahí acaban los enemigos.
- Recoge las monedas rápido; desaparecen a los 20 segundos.
- Lee las tres tareas diarias cada mañana. Son recursos gratis.
- No persigas a los enemigos lejos en la oscuridad. La mayoría vendrán a ti.
- Guarda antes de salir: el juego también guarda solo al amanecer y al anochecer.
- En la noche 10 llega el primer minijefe, y la noche no termina hasta vencerlo. Para entonces ten la muralla y al menos una torre.
- Gasta tus Fragmentos de Alma entre partidas. Hacen cada partida un poco más fuerte.
Keep reading
Survive 100 Nights: how the wall, the gate and the towers work togetherSurvive 100 Nights: cómo trabajan juntas la muralla, la puerta y las torres
Which enemies the wall stops, why the gate is your best spot, the three tower types, and the order to buy your defences.Qué enemigos frena la muralla, por qué la puerta es tu mejor sitio, los tres tipos de torre y en qué orden comprar tus defensas.
 Survive 100 Nights: every weapon, mini-boss and night eventSurvive 100 Nights: todas las armas, minijefes y eventos nocturnos
The 15 weapons and who sells them, the nine mini-bosses and their nights, the night events, and what waits on night 100.Las 15 armas y quién las vende, los nueve minijefes y sus noches, los eventos nocturnos y lo que espera en la noche 100.
 Grandma Is Hungry: where development standsGrandma Is Hungry: así va el desarrollo
What’s already in the game, what’s changing now, and what comes next on the way to Steam.Lo que ya tiene el juego, lo que está cambiando ahora y lo que viene en el camino hacia Steam.